lookin good!

 Registered User

lookin good!
 Stang Hoarder
Thanks Chad!Originally Posted by redfirepearlgt

Stang Hoarder
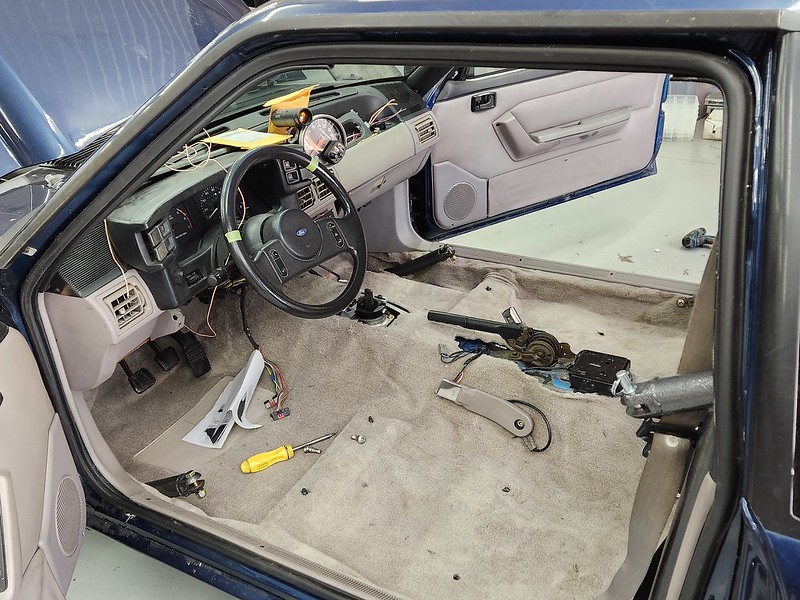
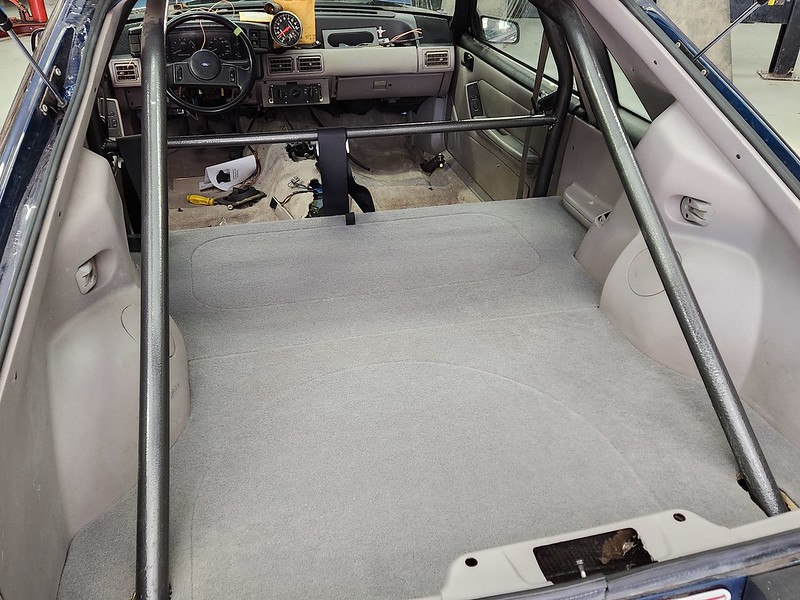
Since the roll bar was all done, we decided to move onto the interior assembly. The big wrench in the works was, you guessed it, the roll bar yet again! We were trying to figure a way to get the rear seat delete kit in and notch it for the roll bar, so I took a thick piece of cardboard and traced the delete part onto it, cut it out, and then used that to make a pattern for cutting the notches for the bar. The big deal was getting it in there with the 1/4 panel plastic in there, so out came the passenger side yet again. We finally got it all ironed out and installed, then had to wrestle the plastic back in and then underneath the delete panel. It was not fun at all. But I think it looks amazing. KDesigns did the delete and I can't recommend them enough. My wife used her Green Machine and cleaned the front seats up, I pulled them back out of the car because they just looked awful. She got them really clean and looking pretty good. I don't have pics of those hosted yet.

Stang Hoarder
I was sick of looking at the black truck intake, so I played around with different silvers I had on the shelf and settled on one. I masked it all off with plastic bags (cheap), and then scotch brite on all the surfaces after using simple green and water to wash the dust and crap off of it. Then wiped it down and sprayed it.

Stang Hoarder
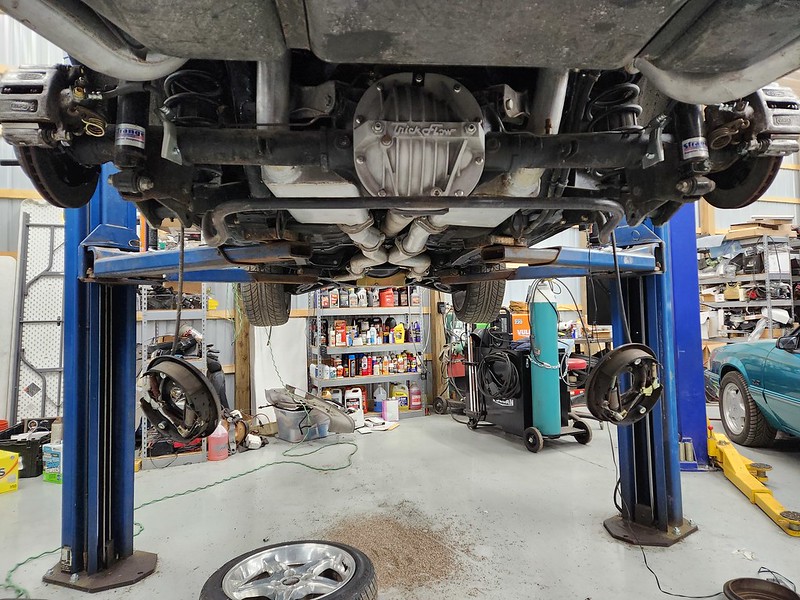
With the interior pretty much finished, I moved onto the rear end. I cleaned up the rear Trick Flow cover and it turned out really well. I used brake clean to get the grease off, then used simple green to get the balance of the dirt off. I then sprayed it with oven cleaner and let it soak in, then sprayed it down again, and let it sit. I washed it really well with water and then let it sit and dry out. It looks terrible when it's wet, looks blackish, but once it dries, I think it turned out great. Looks like new.
Stang Hoarder
I decided to put discs on the back of this thing after giving it a lot of thought. I want it to bring really good money and I don't want any thing left undone. I had the turbo coupe stuff off of red rocket sitting in storage, so I grabbed the discs and calipers/pads/brackets off of it and then called North Race cars (northracecars.com). This rear end has 9 inch ends on it, so it required a different bracket to work with these disc brakes and the 9 inch bearings. they sent them to me and although it took some massaging and cutting a notch to slide over the axle flange, since the bearings were already pressed on, they worked perfectly. I cleaned up the rotors and the calipers so when it finally warms up and stays warm, I can paint the front and rear calipers. I also gutted the metering block and used the plug I got off of ebay. I have an adjustable proportioning valve on its way, should be here Wednesday. I'll install it and we'll bleed the brakes and it should be ready to go onto the dyno.
Today I got a really nice kit from LMR, has the special brake cables, brackets, and handle cable for a disc conversion. I got the cables on, now I get to disassemble the entire interior I just assembled to get the damn parking brake handle out to modify it. Oh well.

There are currently 2 users browsing this thread. (0 members and 2 guests)
 Posting Permissions

 Reply With Quote